
What are Shareable Data Plans?
Shareable Data Plans is a major new product US Mobile launched. Our subscribers can set up multiple lines to draw from a shared “pool” of data.
Everything we’ve sold to this point is an individual plan: one plan for one line. With pools (or shareable data plans), you buy a base plan which is an amount of data all the lines will share. These Pools are meant for families, groups of friends, and businesses that have multiple lines. However, you can still use shareable data plans on just one line if you choose to.
In this article, we'll cover how you can manage your Shareable Data Plans.
Setting Automatic Top Ups
You can enable auto Top Ups on your Pool so you are covered in case your shared data plan is about to run out of data. Auto Top Ups are triggered automatically when your pool has just 10% of the total pool data left.
You can enable automatic Top Ups by going to settings. Here, you'll find the options to set the amount of data you get on each automated Top Up, as well as the number of Top Ups that will be automatically purchased for each cycle. Setting limits on the auto Top Ups will help you better manage how much you're charged each month.

Don't worry if you're not able to use all of your purchased top-ups. They will automatically roll over to the next cycle.
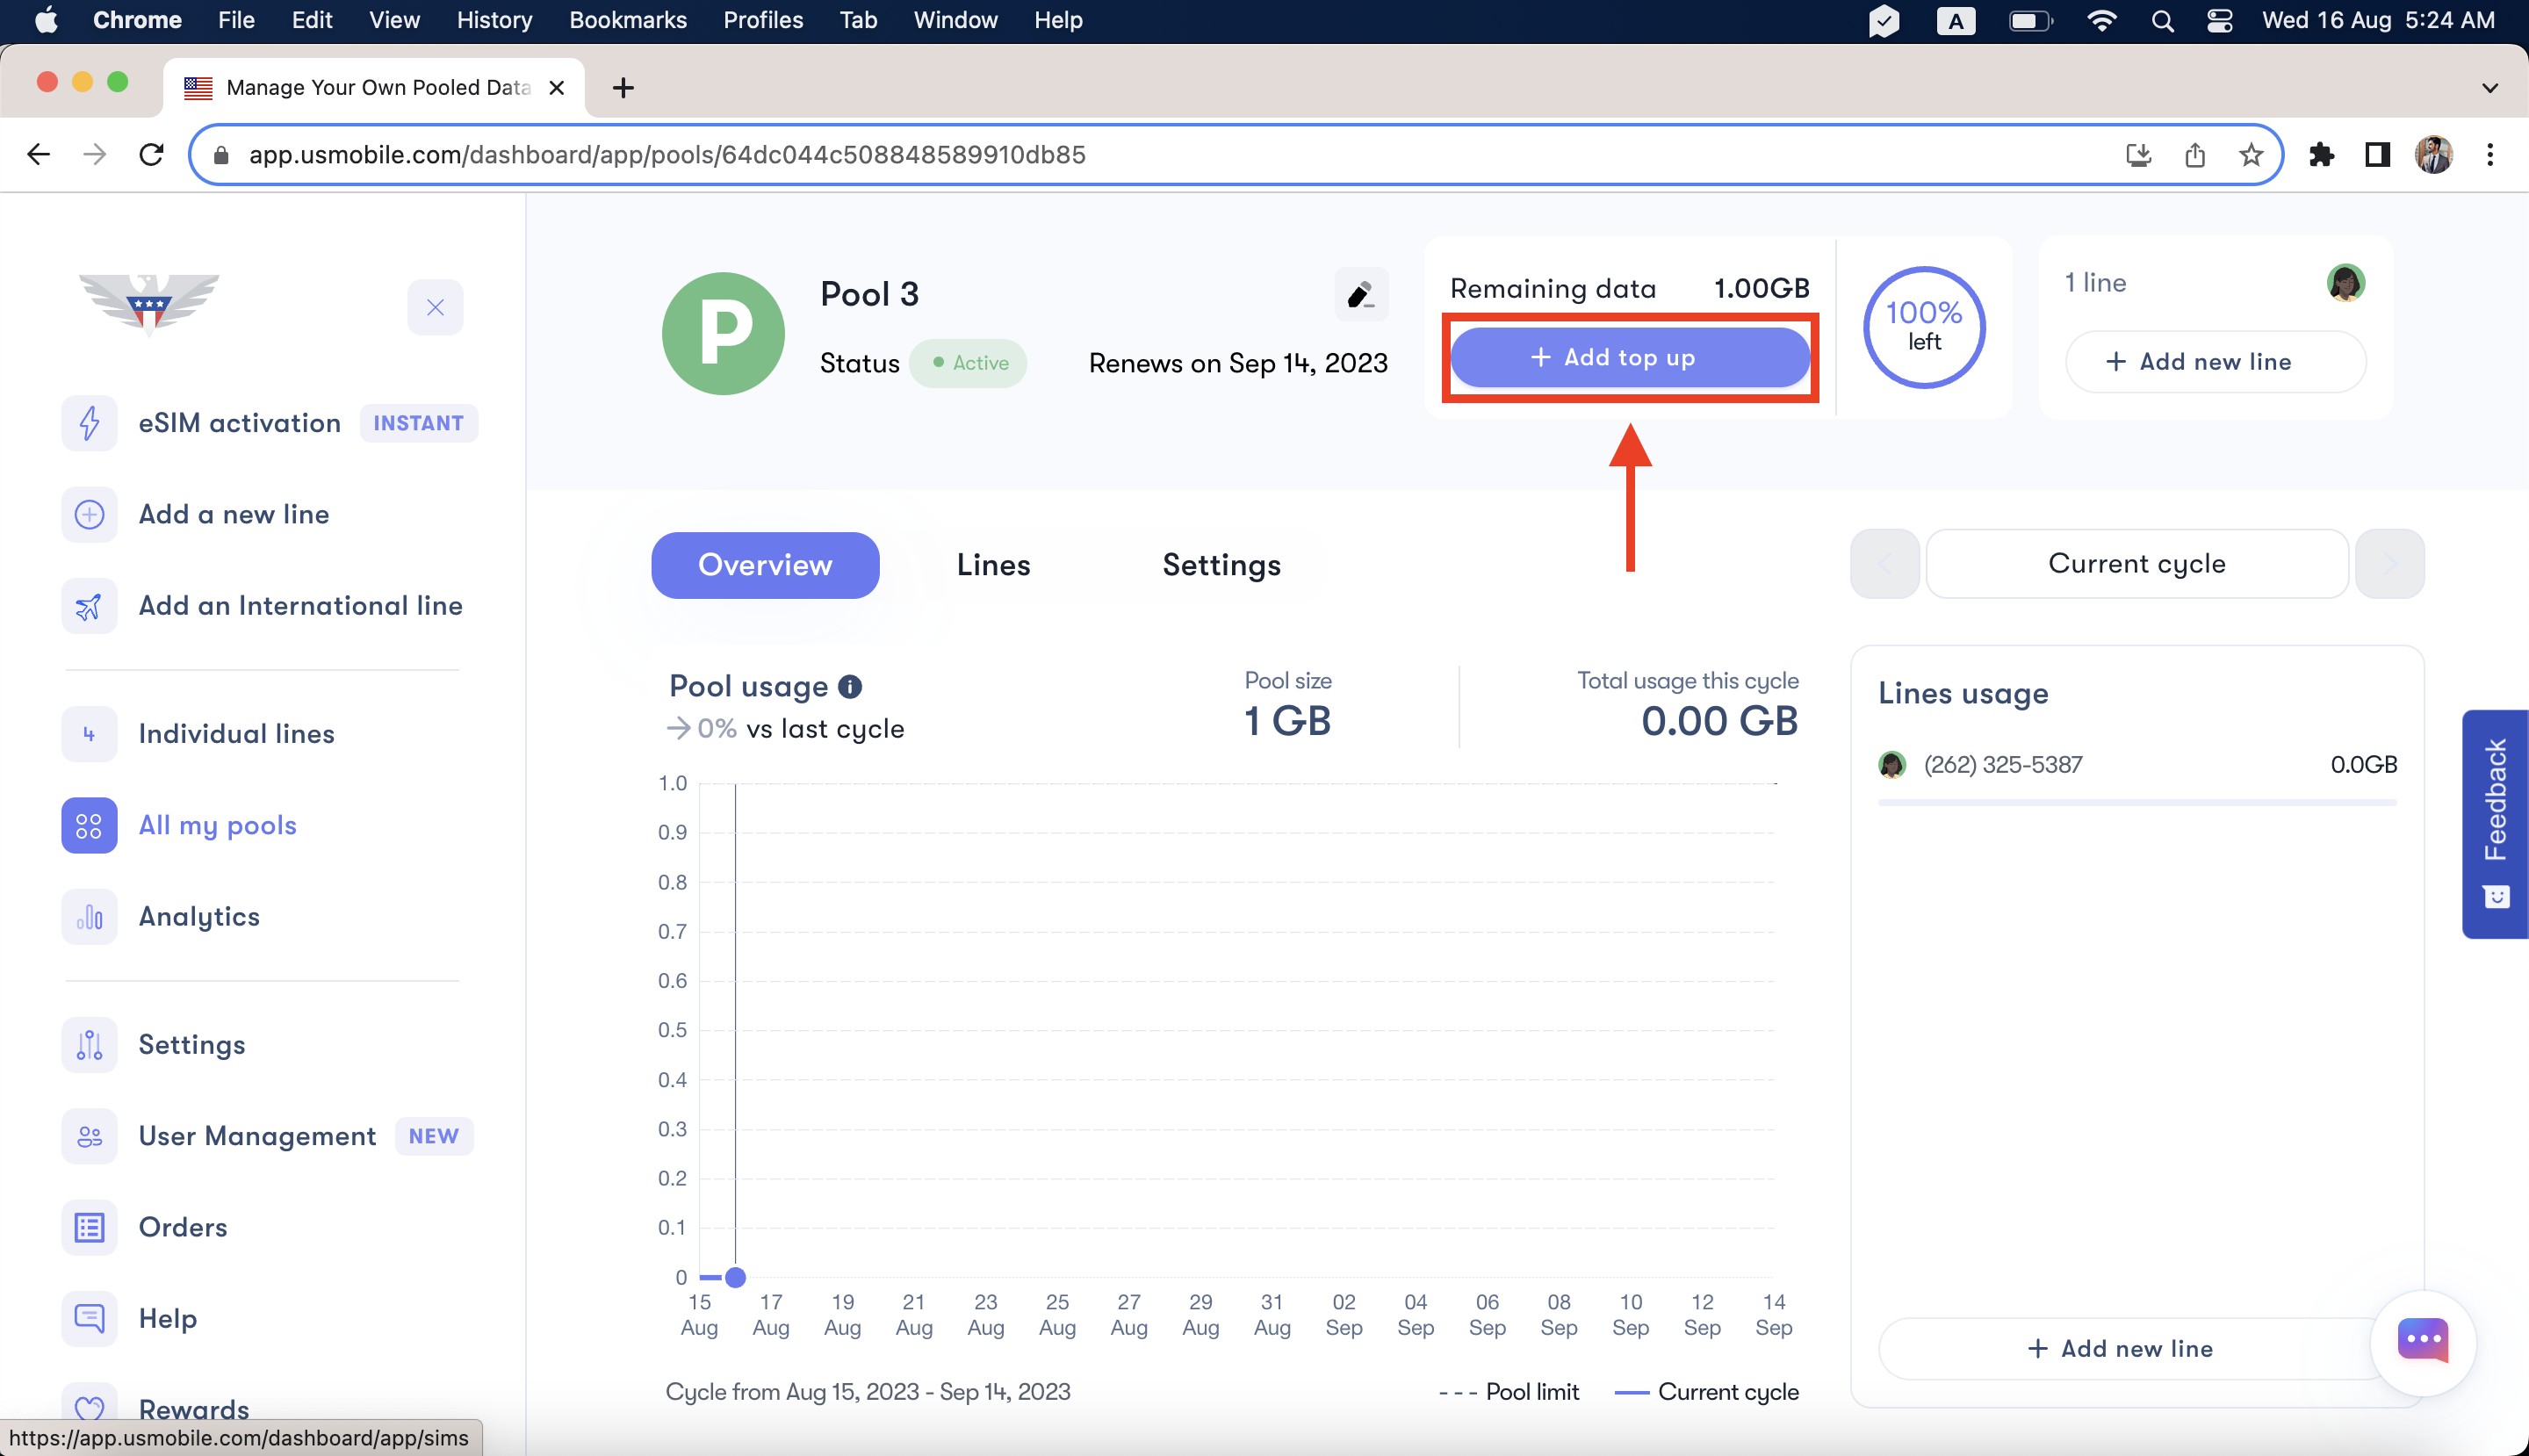
Get a Top Up
Would you rather get the Top Up yourself? Go to the respective pool and then press the +Add Top Up button, and you can buy the top-up size that's just right for you. Your top-up will increase your pool balance immediately. As with auto Top Ups, unused data amount from manual Top Ups also roll over to the next billing cycle.
Change your base plan
If you want to get more data in your next cycle than you first signed up for
Go to Settings on your pool page > click on the little pencil icon in front of Pool Information
If you change your base plan, you won't be billed right away. We'll show you the date of your upcoming bill, so there are no surprises. Your change will take effect when your next cycle begins.
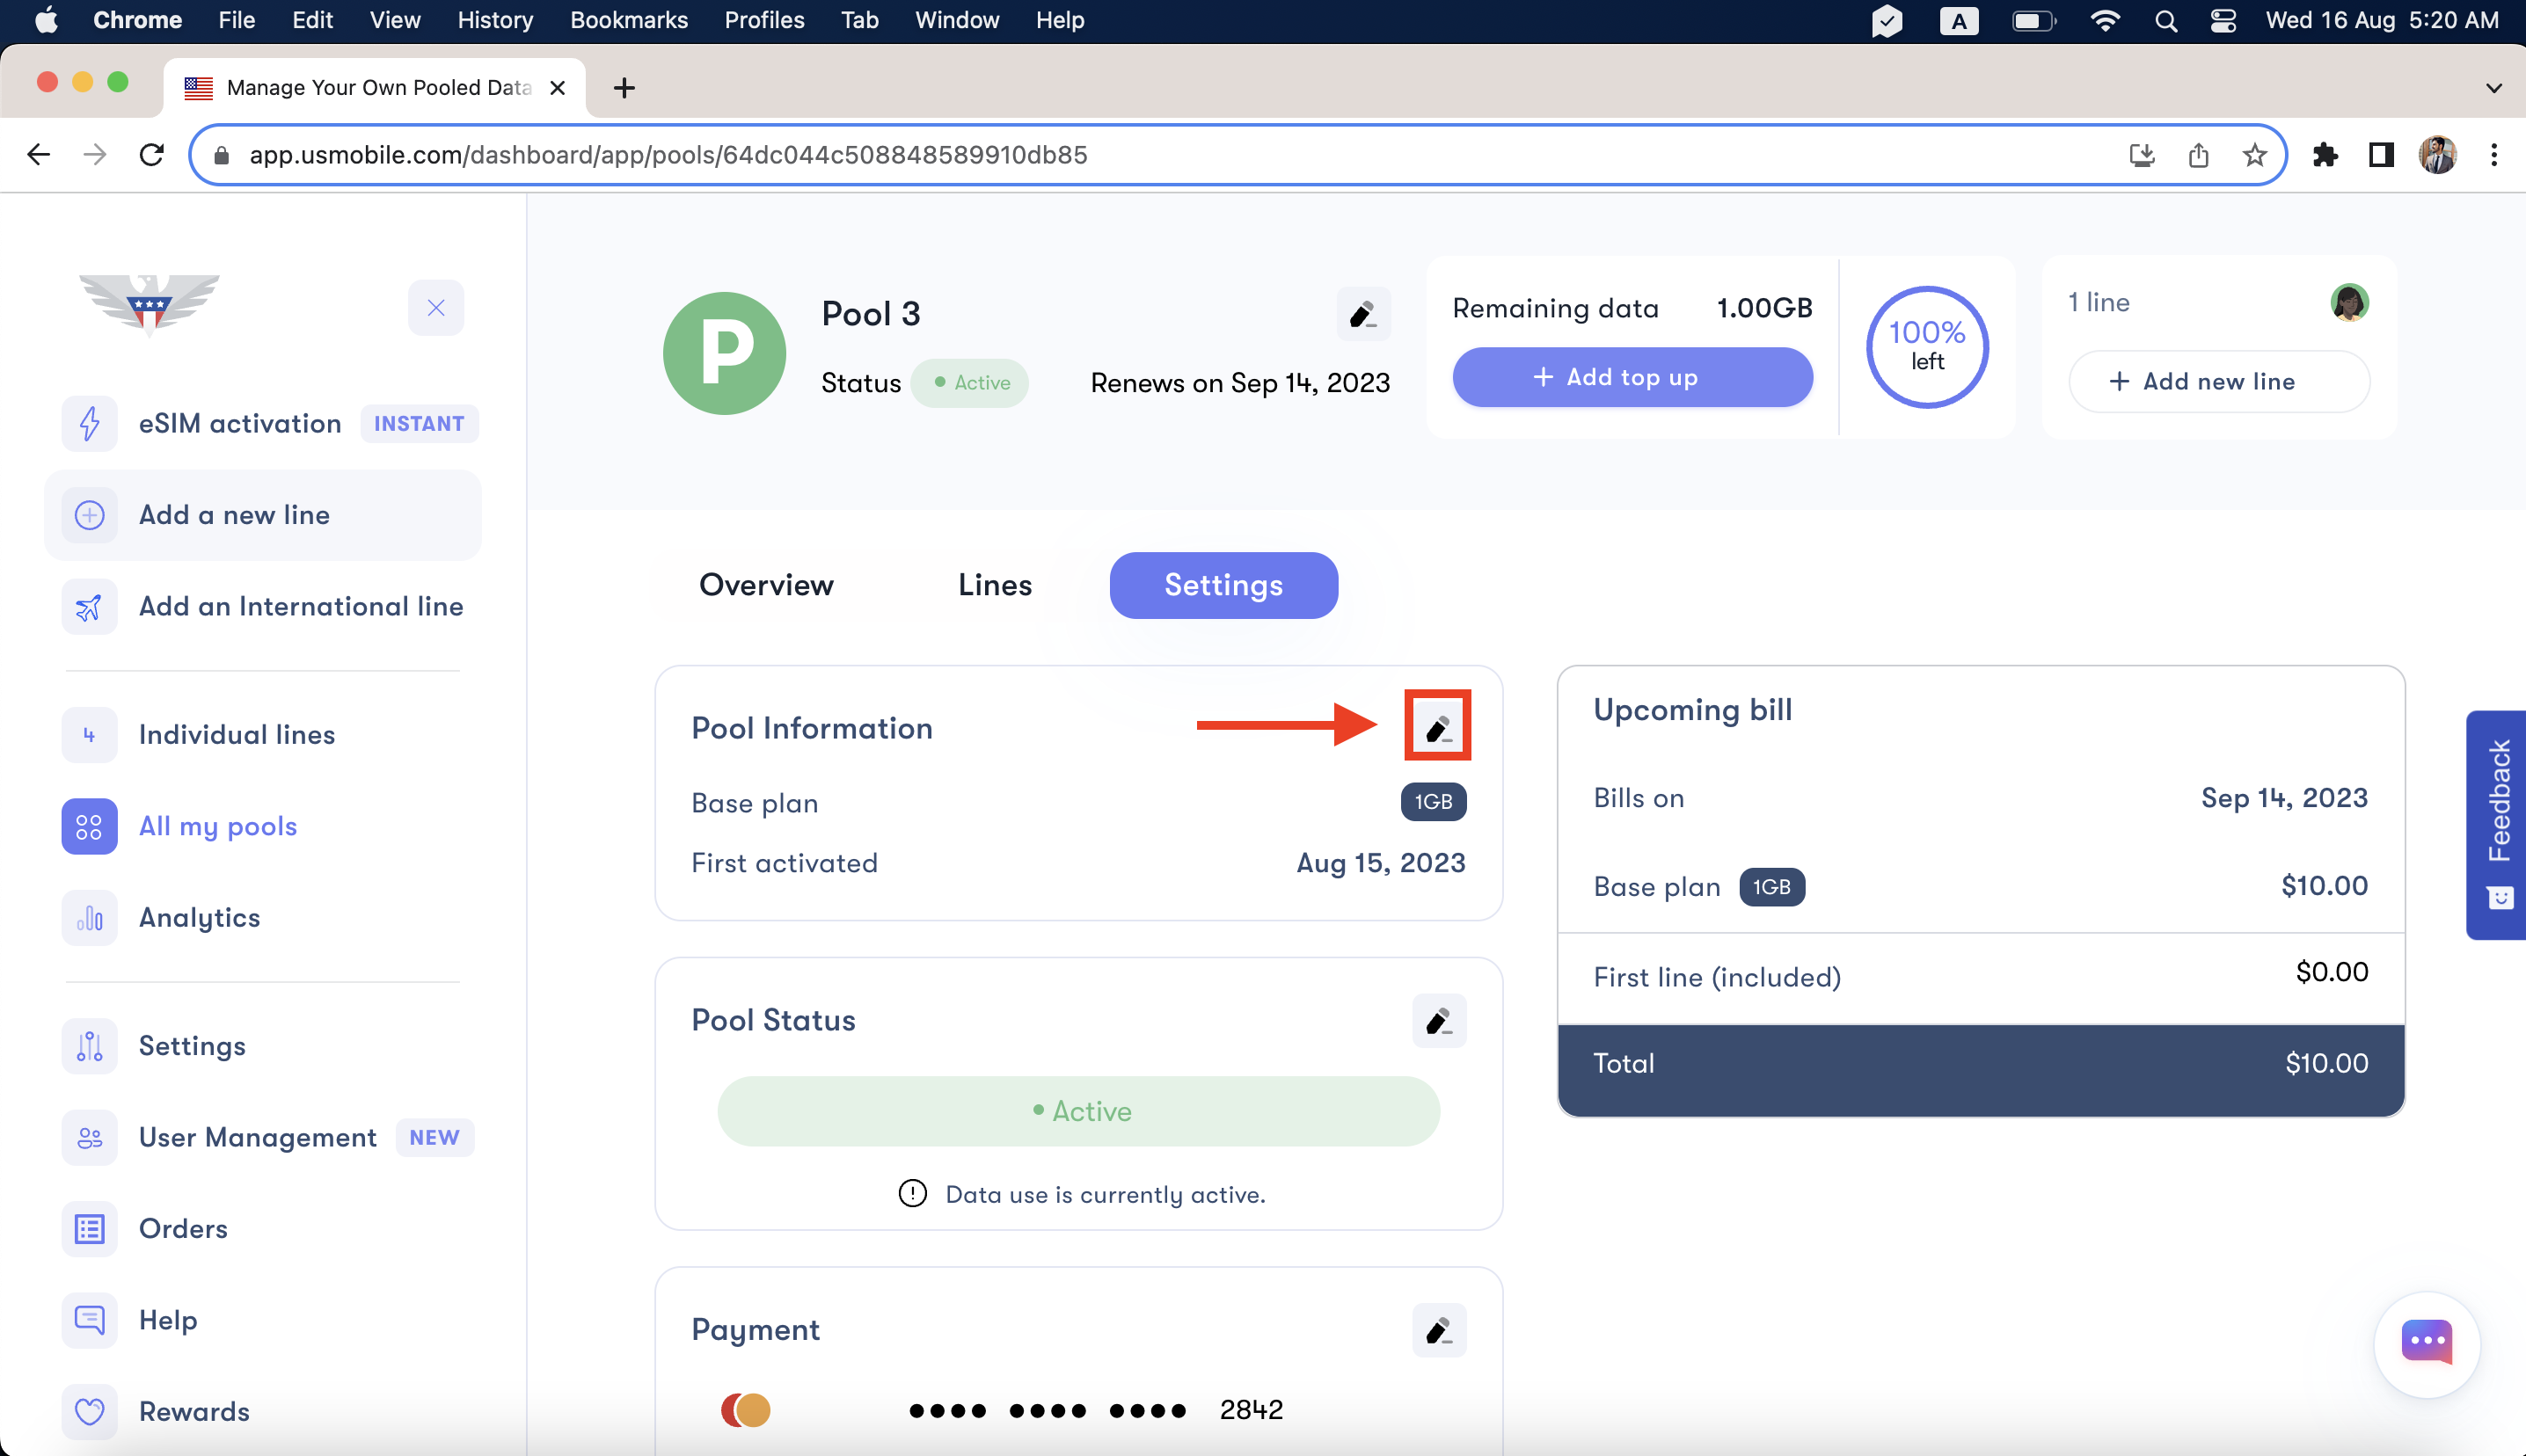
Once you click on the pencil icon, you will get a window on your right giving you the option of changing the amount of data for your next base plan.
It will also tell you the new bill you would have to pay and the date when your next payment is due. Click on Save Changes to save the changes you have made to the base plan.

Adding a new Line
You can always add or remove a line during the billing cycle. If you add a line mid-billing cycle, the access fee will be proportioned according to the days remaining in the billing cycle.
Suppose you add a line 10 days after the billing cycle has started, so you will be charged 2/3rd of the $8 access fee, which will be $5.3 in this particular case.
You can add a line by clicking on Add New Line on your pool page.
When you click on this, you will get options for adding any existing line to the pool, getting a new number if you want to activate a SIM card, or even transferring your number from any other carrier by activating a new SIM card.

Removing a line
You can take a line out of your pool anytime as well. That means the line will lose service right away. At this point, it will show up in your dashboard as expired, and you would have to purchase a plan manually to reactivate it.
To remove a particular line, go to the lines tab, select the particular line/s that you wish to remove, and click on Edit.
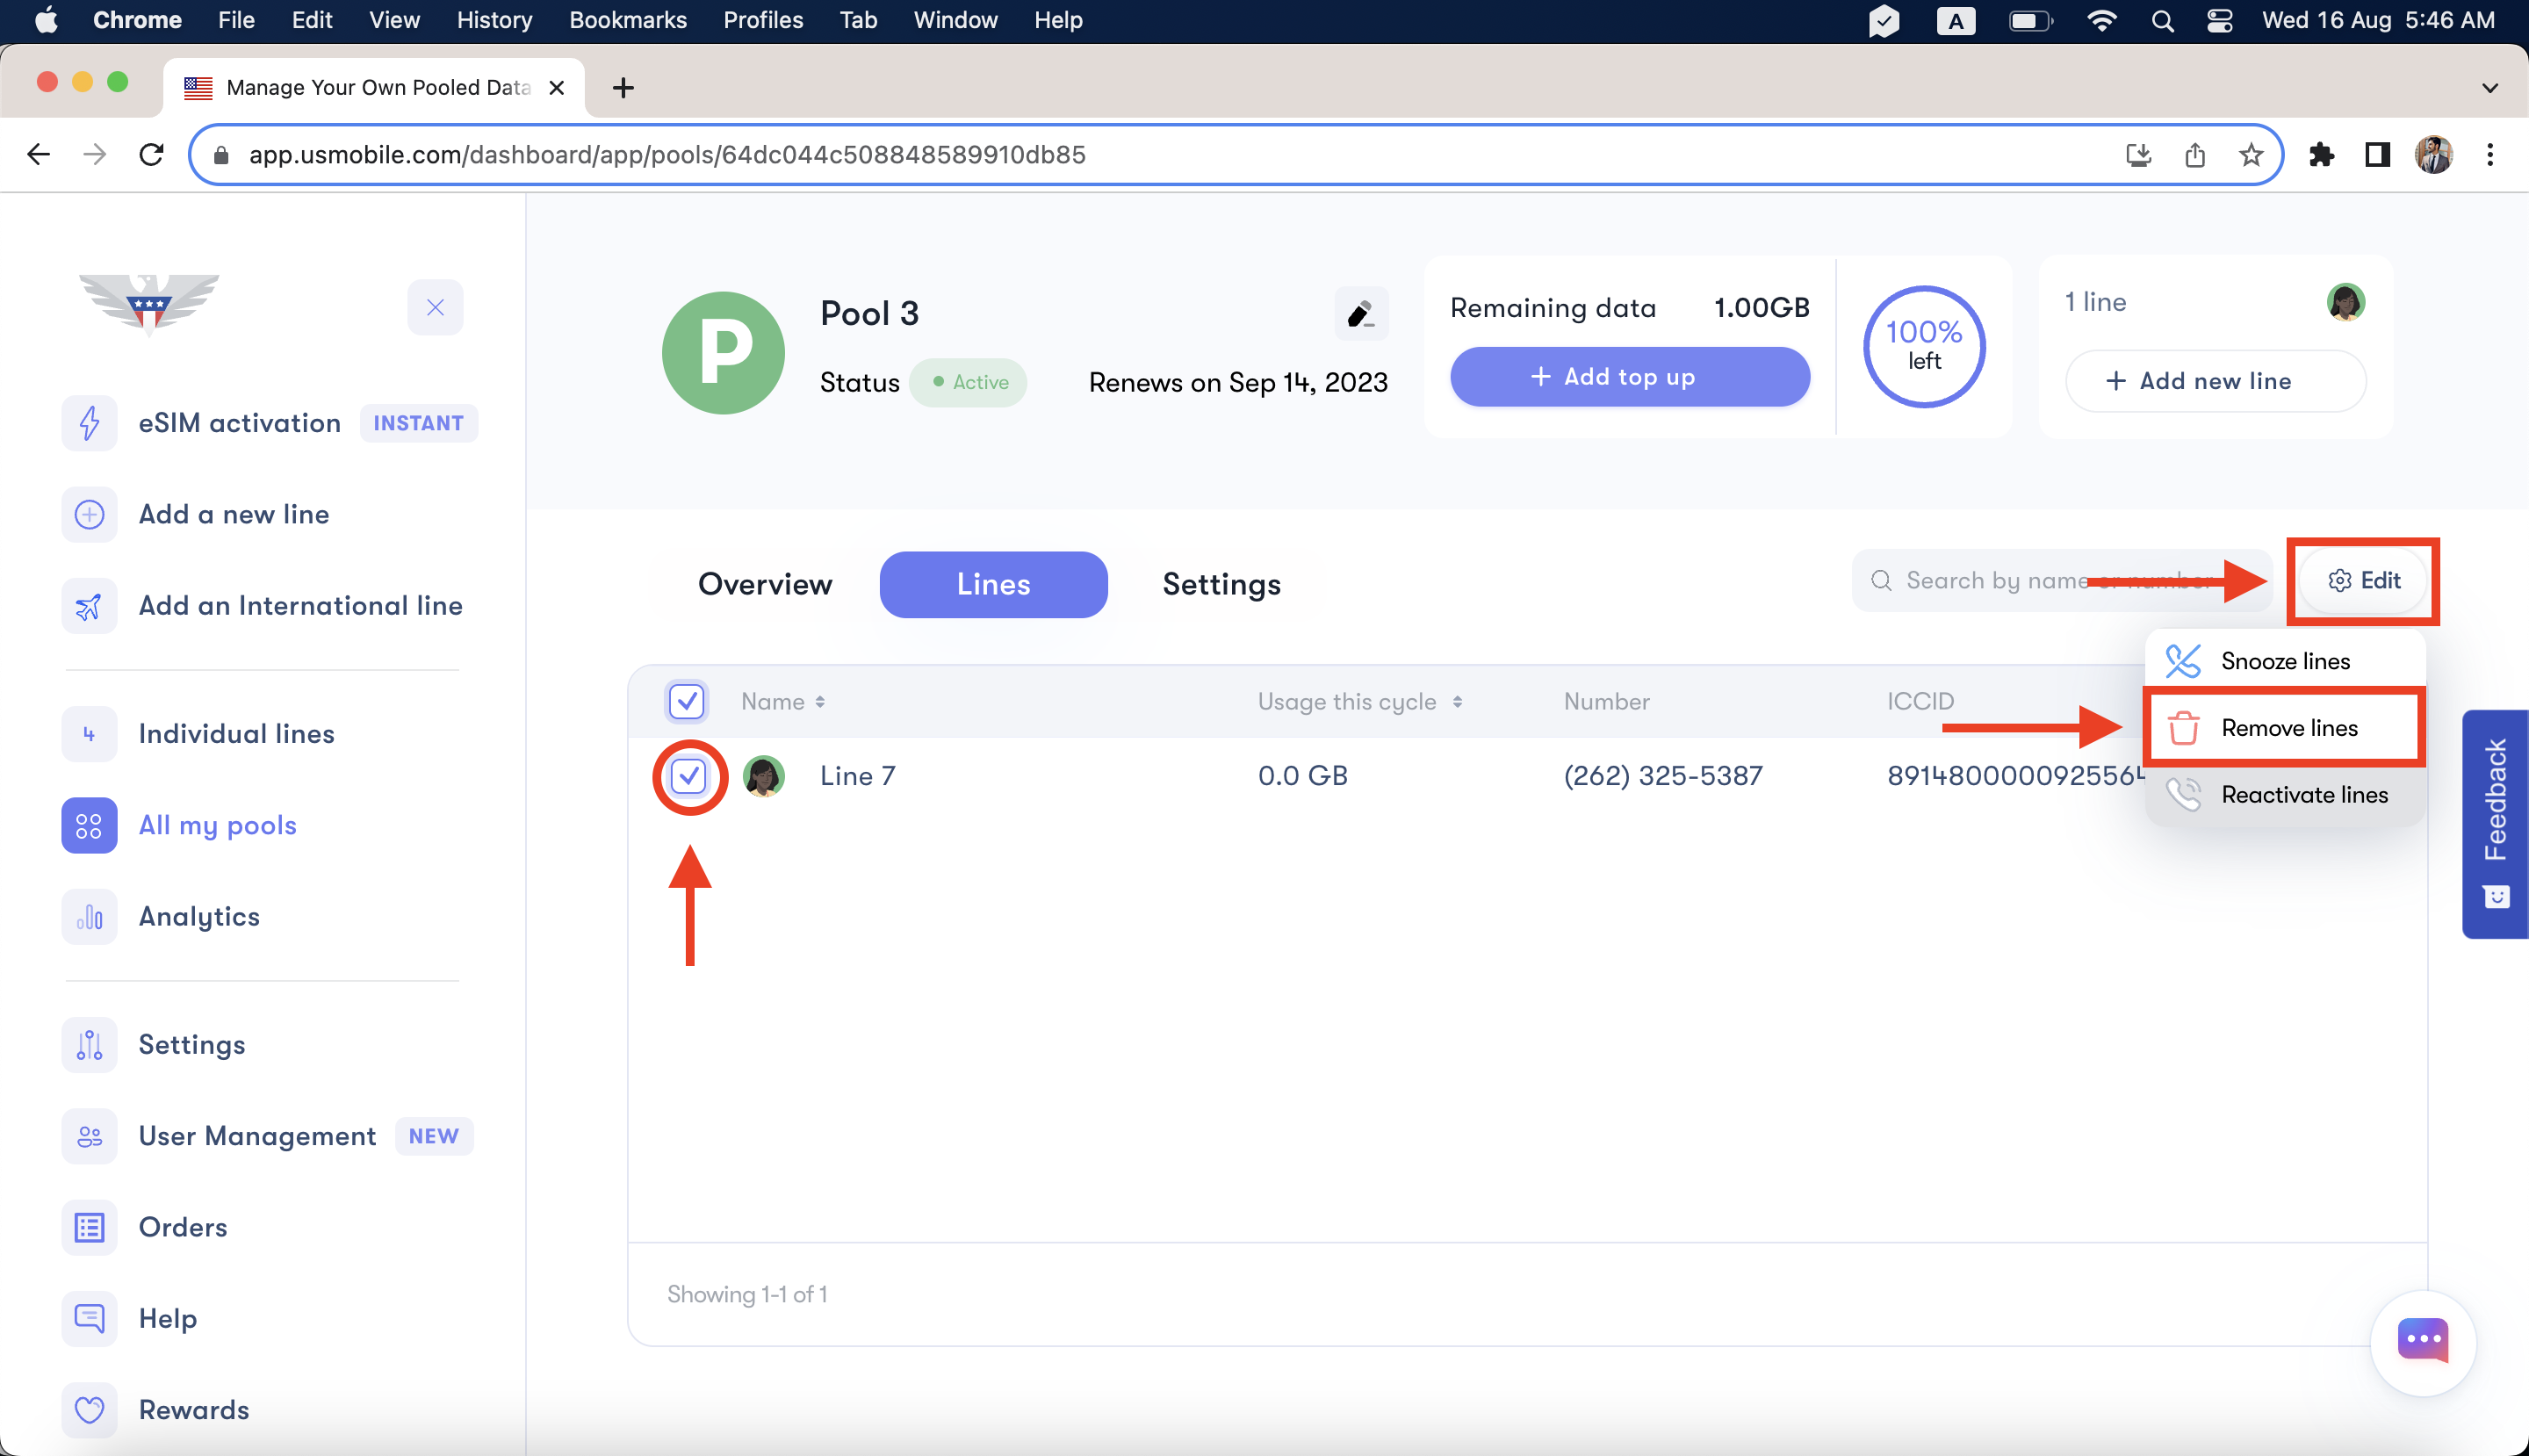
Once you do this, you will get an option to either remove the line or snooze the line or reactivate a snoozed line that is still in the pool. To remove the line from the pool, you need to click on Remove Line.
Do I need to do anything to maintain my shareable data plan?
Nope, we've got you covered! All your pools and lines will renew automatically every 30 days. You don't need to do anything.
Your pool service will only lapse if you snooze or deactivate your pool.
I don't want to pay for this anymore. What are my options?
We'd be sorry to see you go, but we know you value flexibility. Here's what you can do:
Snooze
Either choose a couple of lines to snooze or snooze your entire pool. We'll charge you a small service fee to keep your number, and you can restore the lines and the pool anytime!
To snooze particular lines, you need to select those lines and then click on Edit, and choose the option of Snooze Lines. The lines will still be a part of the pool but will be snoozed and will immediately lose service
Remove lines
You can take a line out of your pool anytime. At this point, it will show up in your dashboard as expired. That means the line will lose service right away.
To remove particular lines, go to the lines and then select the particular line/s that you wish to remove then click on Edit and choose the option of Remove Lines.
Deactivate
Turn off your pool. When you do this, your lines will lose service right away, and you'll never get charged again for them. It will be possible to restore your number about 30 days down the road.
To deactivate or snooze the whole pool, go to the pool page and then go to Settings. Once you are on Settings, click on the small pencil icon in front of Pool Status.
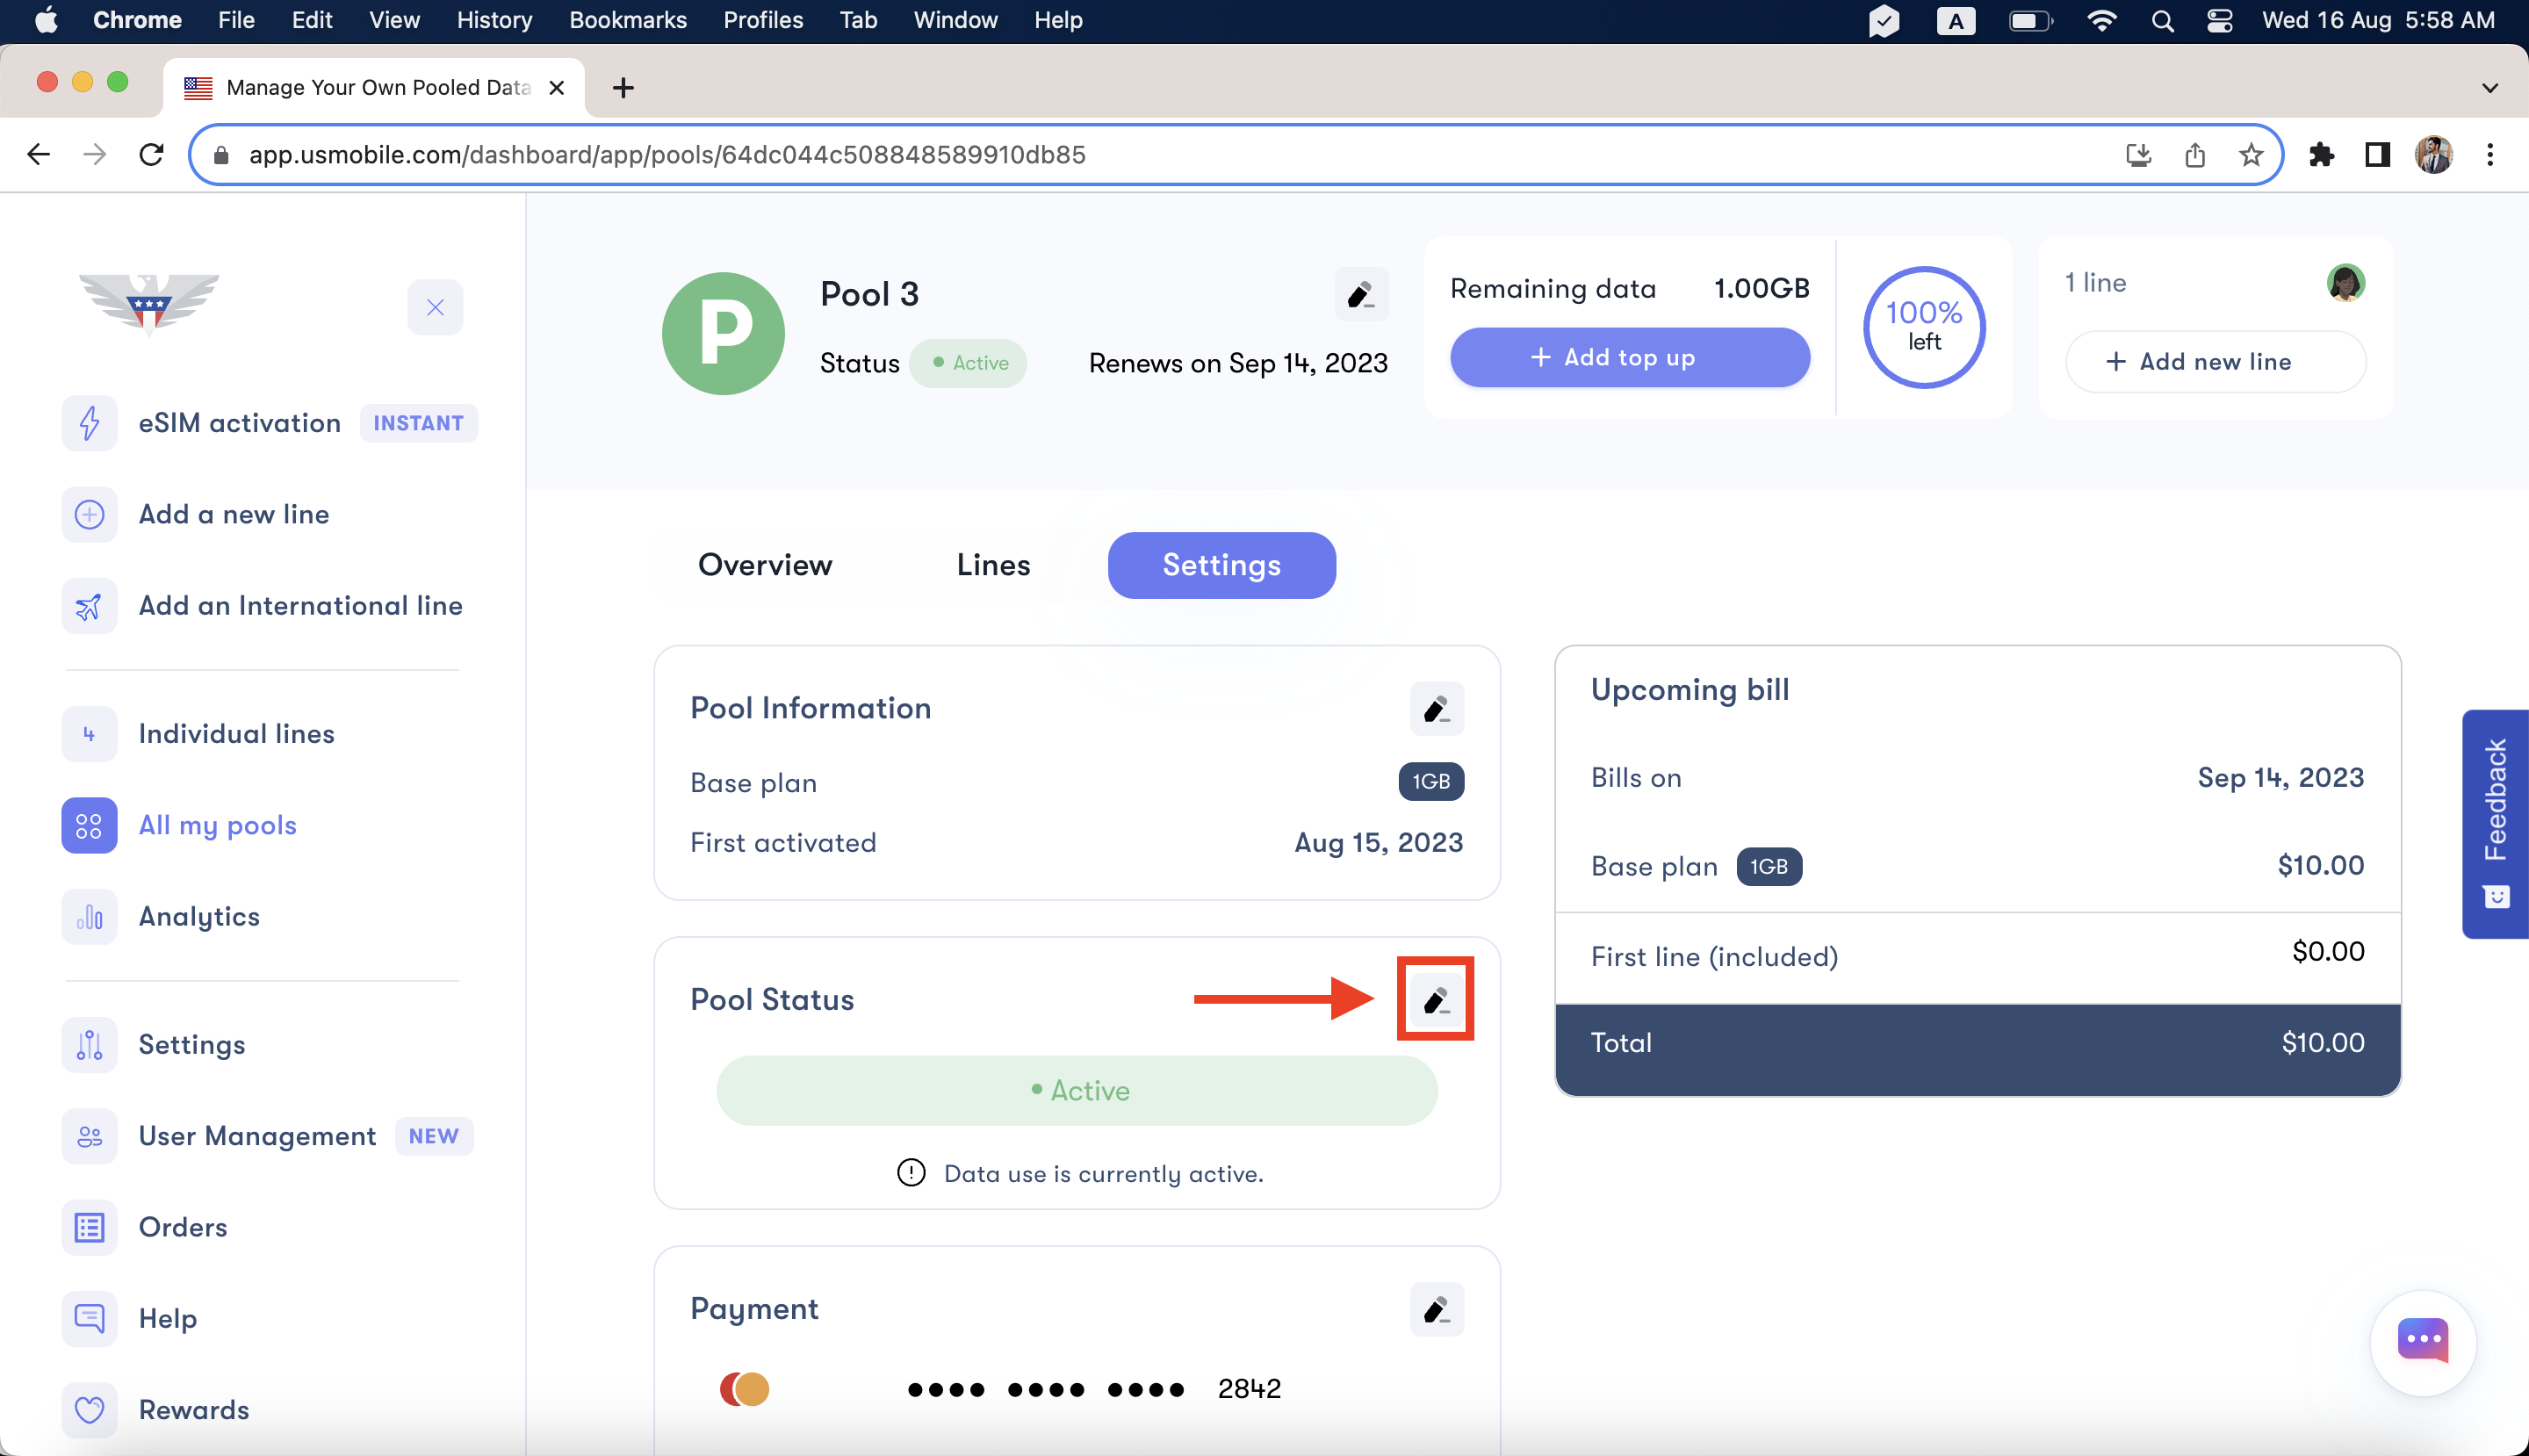
Once you click on the pencil icon, you will get a new window on your right, giving you the option of snoozing or deactivating your pool. Selecting the Snooze option and clicking on Save Changes will schedule your pool to be snoozed once your current billing cycle ends. You will be asked to type "DEACTIVATE" after selecting the Deactivate option, saving the changes will right away deactivate your pool, and all of the lines will be shown as expired under Individuals Lines. You can reactivate your pool anytime you want.

If you need help or have questions, please feel free to contact us via call (1-878-205-0088), email ([email protected]), or via chat.