If your Samsung device does not start working right away after you’ve inserted an activated Warp 5G SIM and restarted it, then please try the following troubleshooting steps.
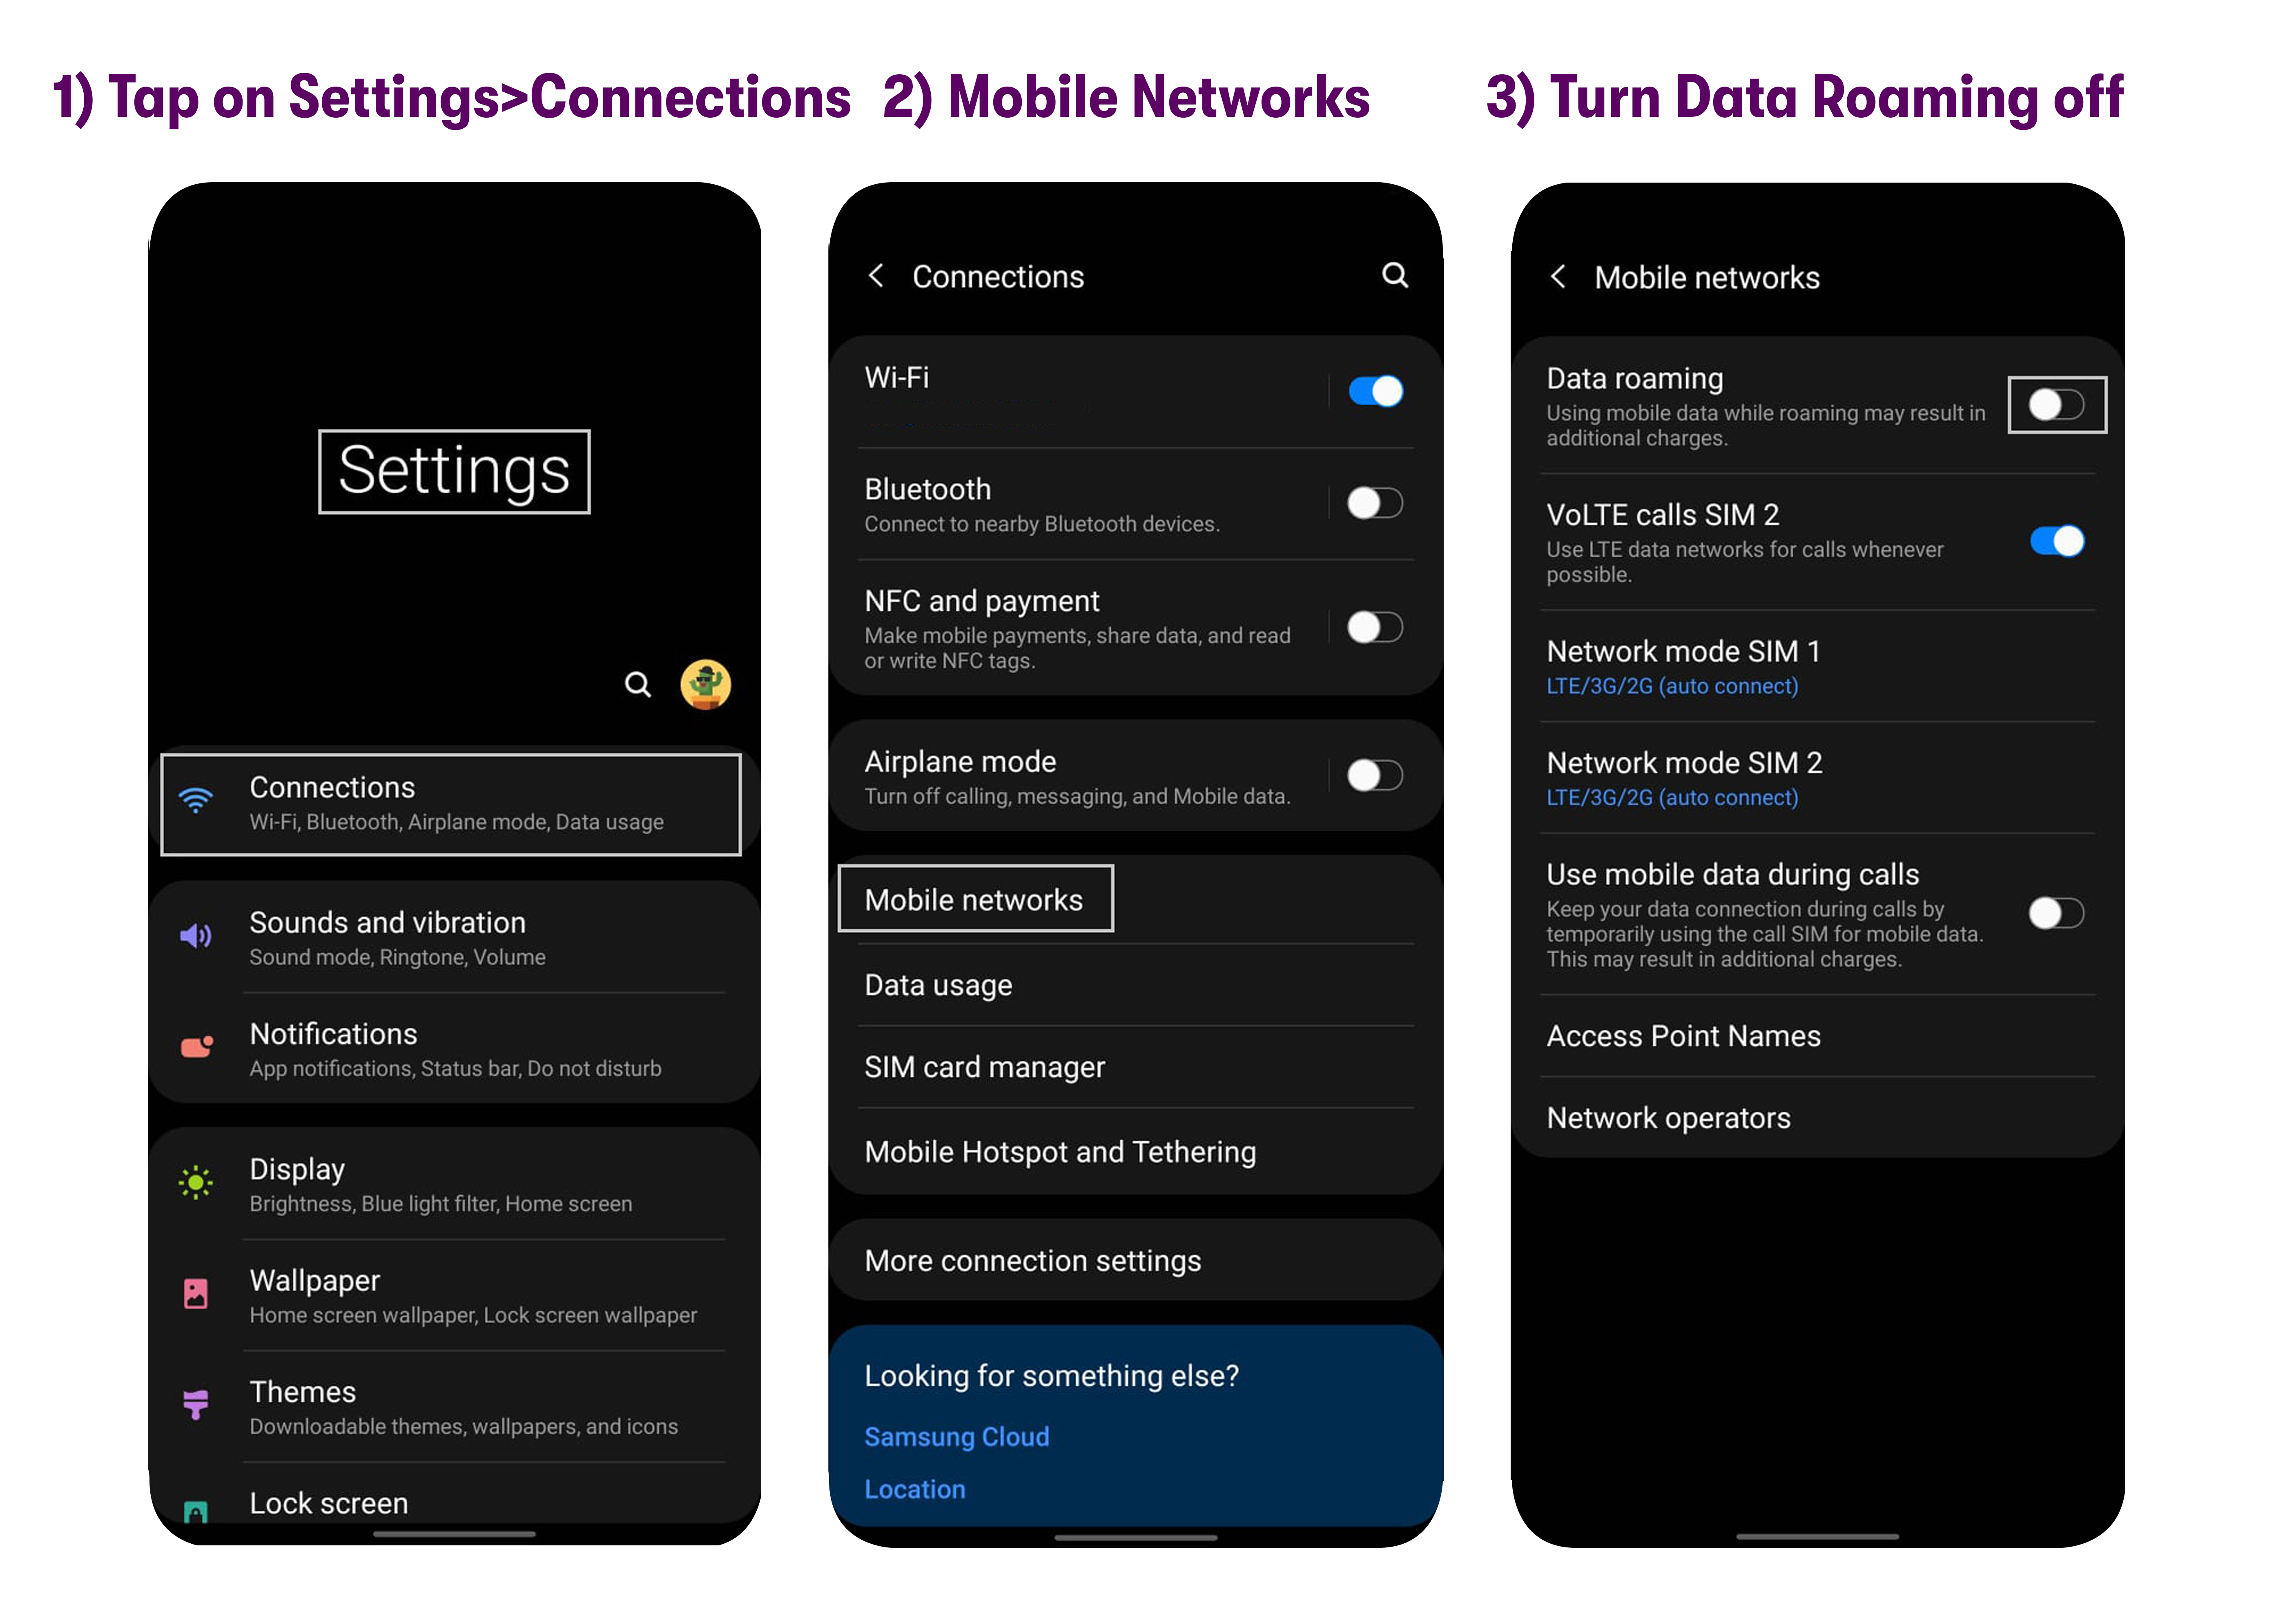
Step 1. Turn Data Roaming off
Swipe up on the home screen to see all your apps.
Tap on Settings > Connections / Network & Internet > Mobile Networks / Cellular networks.
Toggle the switch to turn Data roaming OFF.
If Data roaming is switched off, the switch will be greyed out. If your mobile data is turned off, the switch will be grayed out as well, and you cannot move the switch.
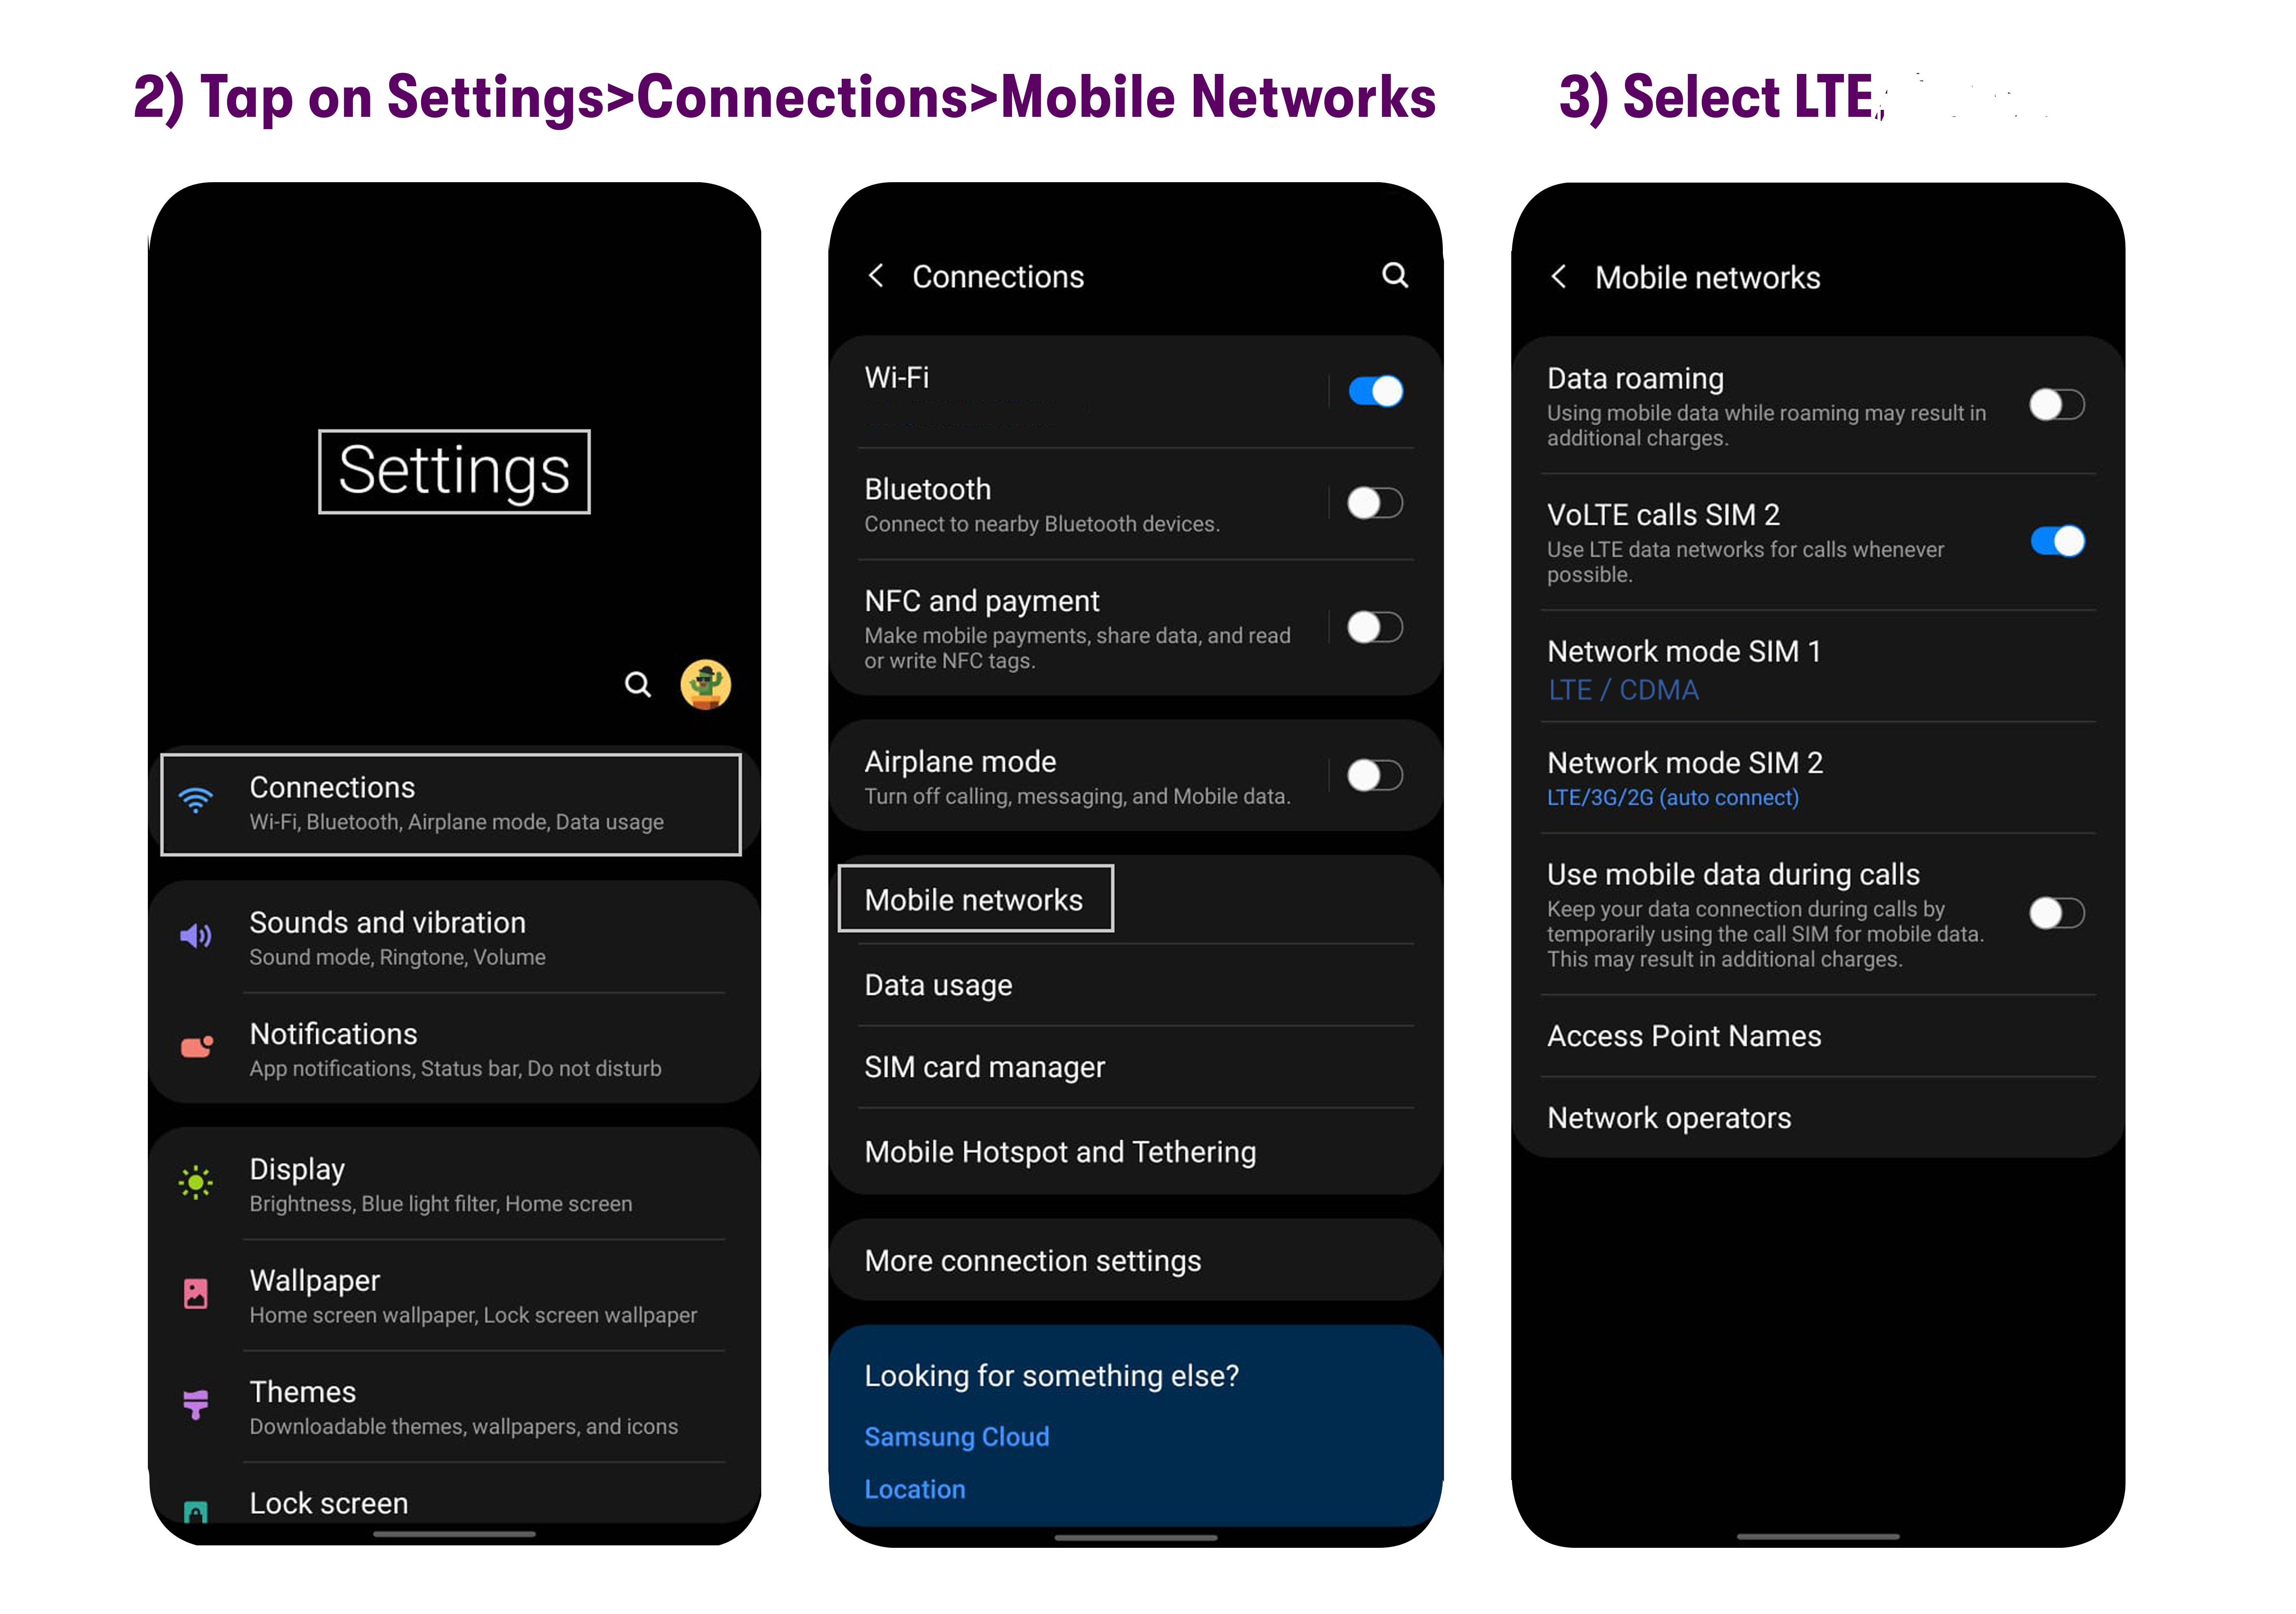
Step 2. Change Network Mode
Swipe up on the home screen to see all your apps.
Tap on Settings > Connections / Network & Internet > Mobile Networks / Cellular networks > Preferred network type / Network mode.
Select LTE only.
If LTE only is not available, please dial *#*#4636#*#* -> Phone information -> Set Preferred network type -> Change it to LTE only -> and tap on Call.
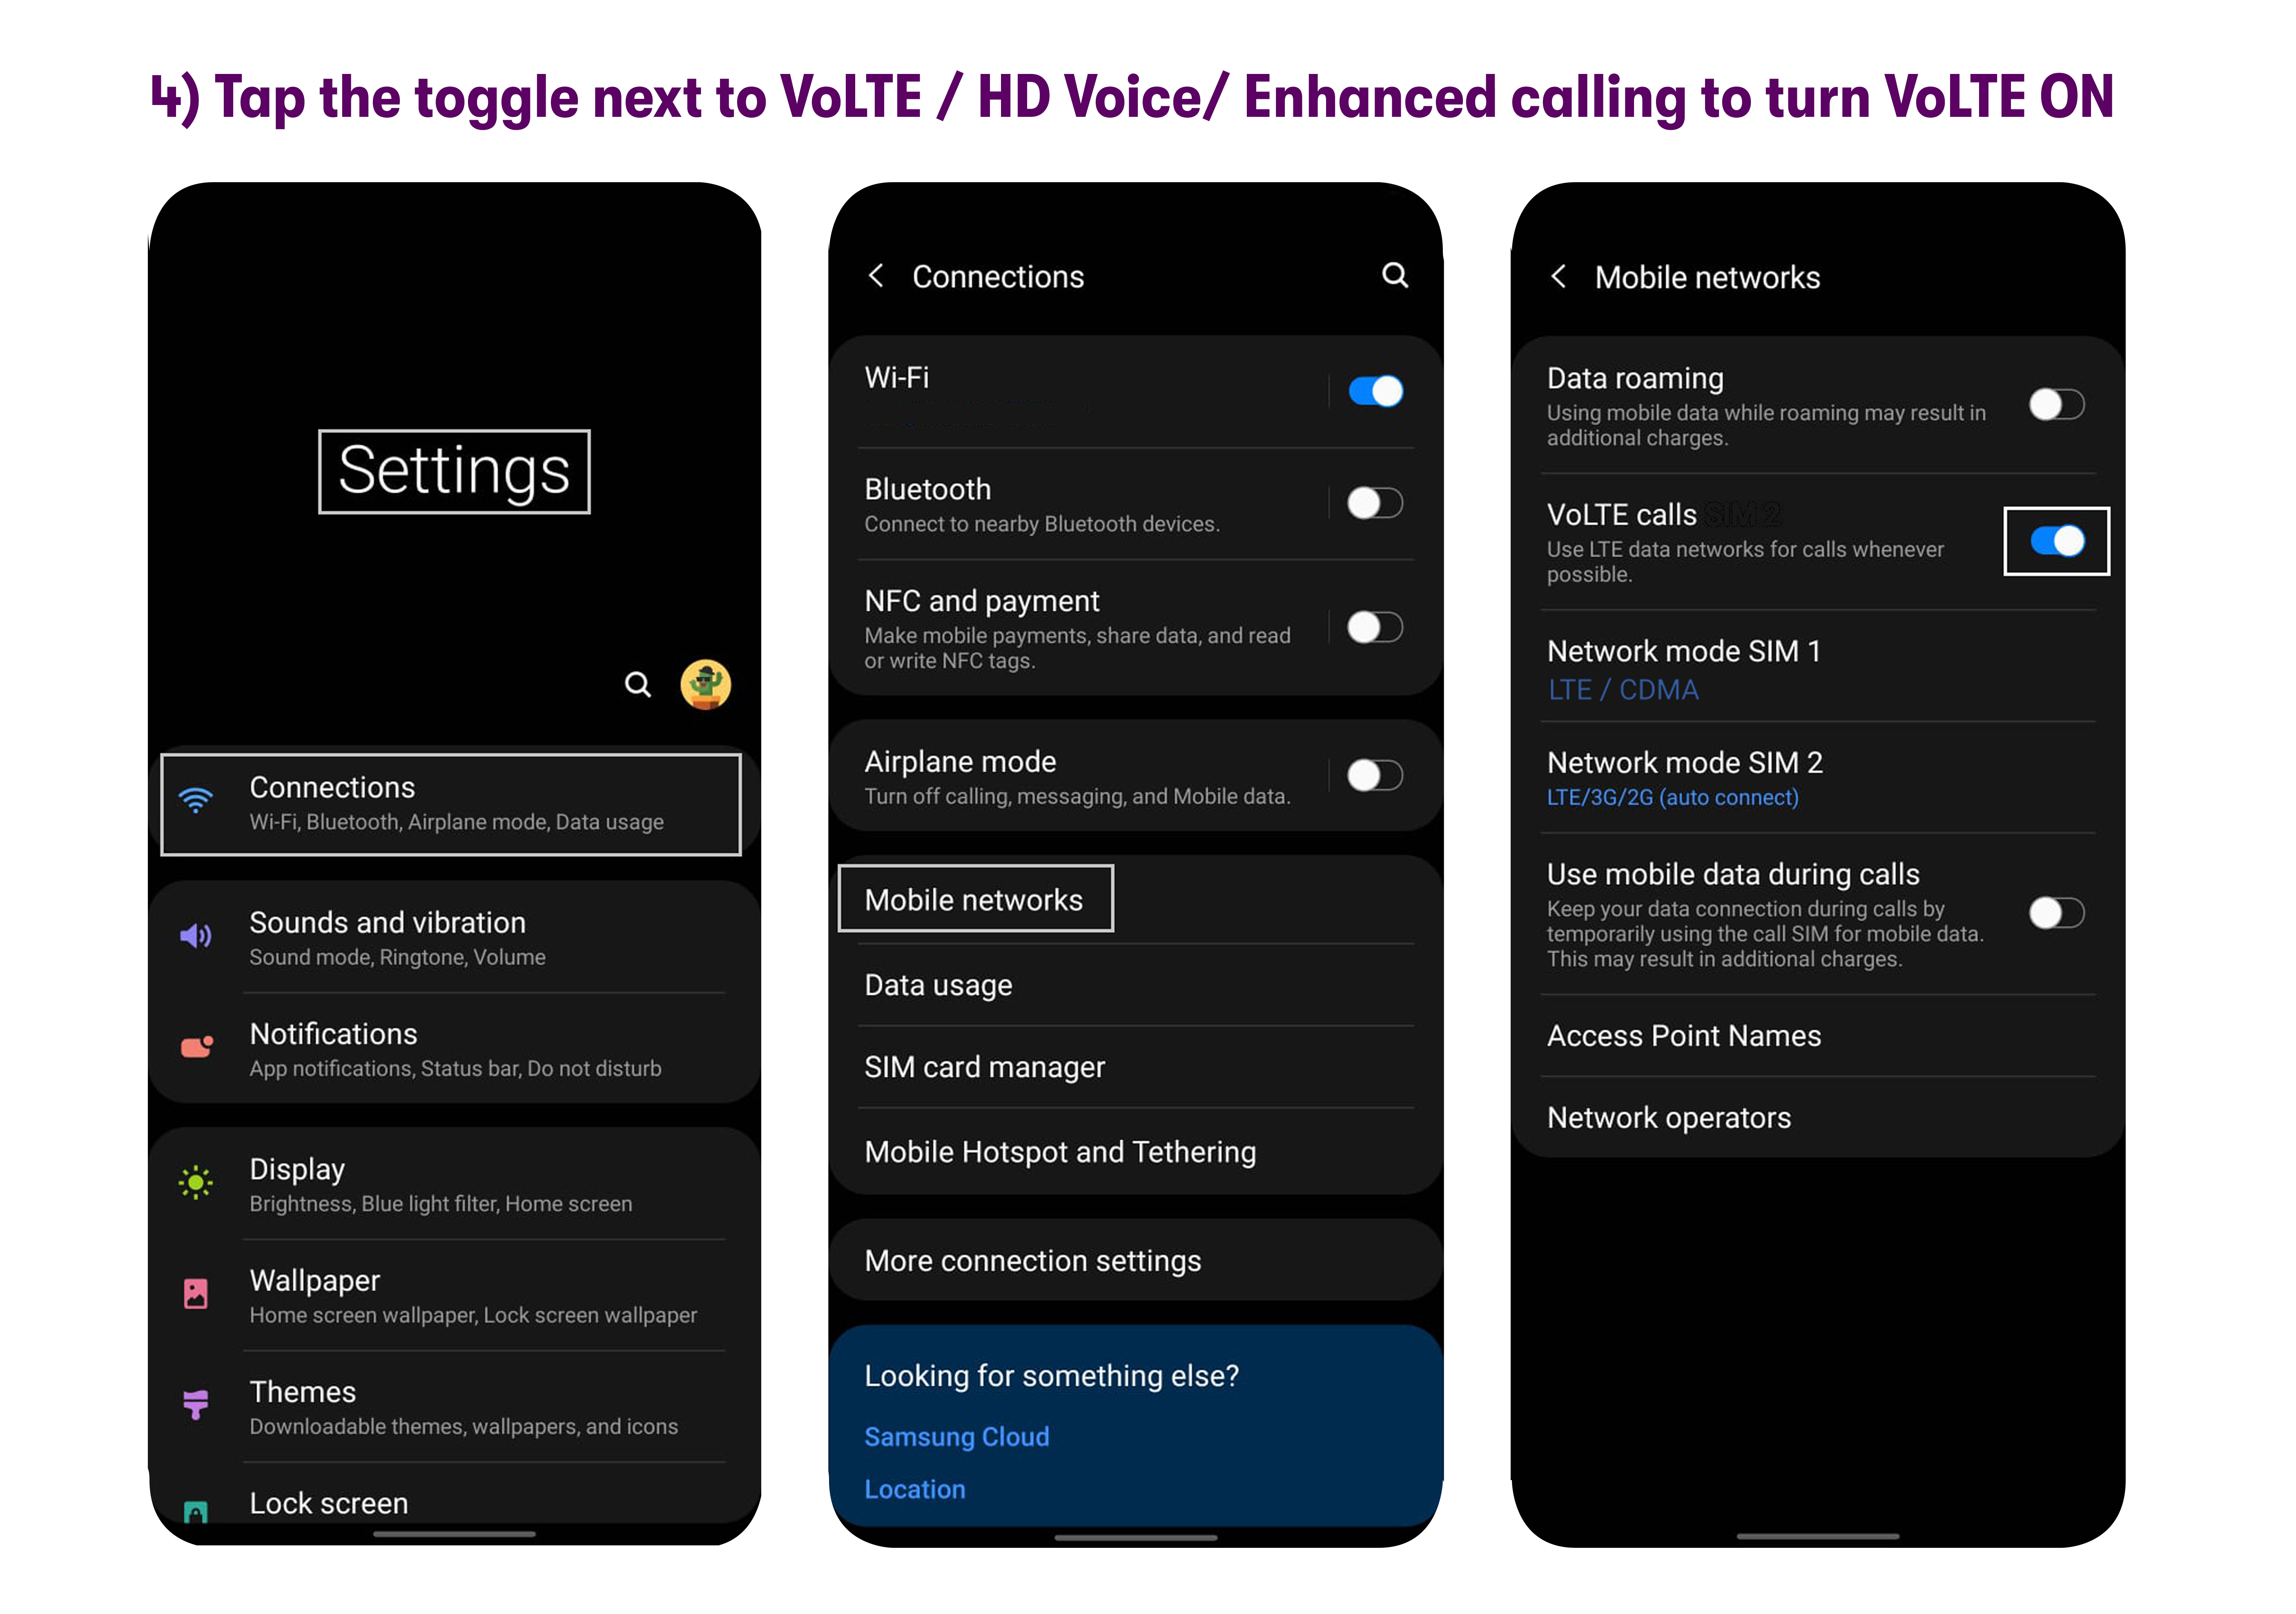
Tap the toggle next to VoLTE / HD Voice/ Enhanced calling to turn VoLTE ON
If you do not see the VoLTE setting please reach out to customer support.
Step 3. Turn on Wi-Fi and Turn off Mobile Data
Turn on Wi-Fi: pull down the notification tray by sliding your finger down from the top of the screen, then tap the Wi-Fi toggle. Alternatively, you can tap Settings > Connections / Network & Internet and turn Wi-Fi on from there.
Turn off Mobile Data: pull down the notification tray by sliding your finger down from the top of the screen, then tap the Mobile Data toggle. Alternatively, you can tap Settings > Connections > Data Usage > Mobile Data and turn Mobile Data off here.
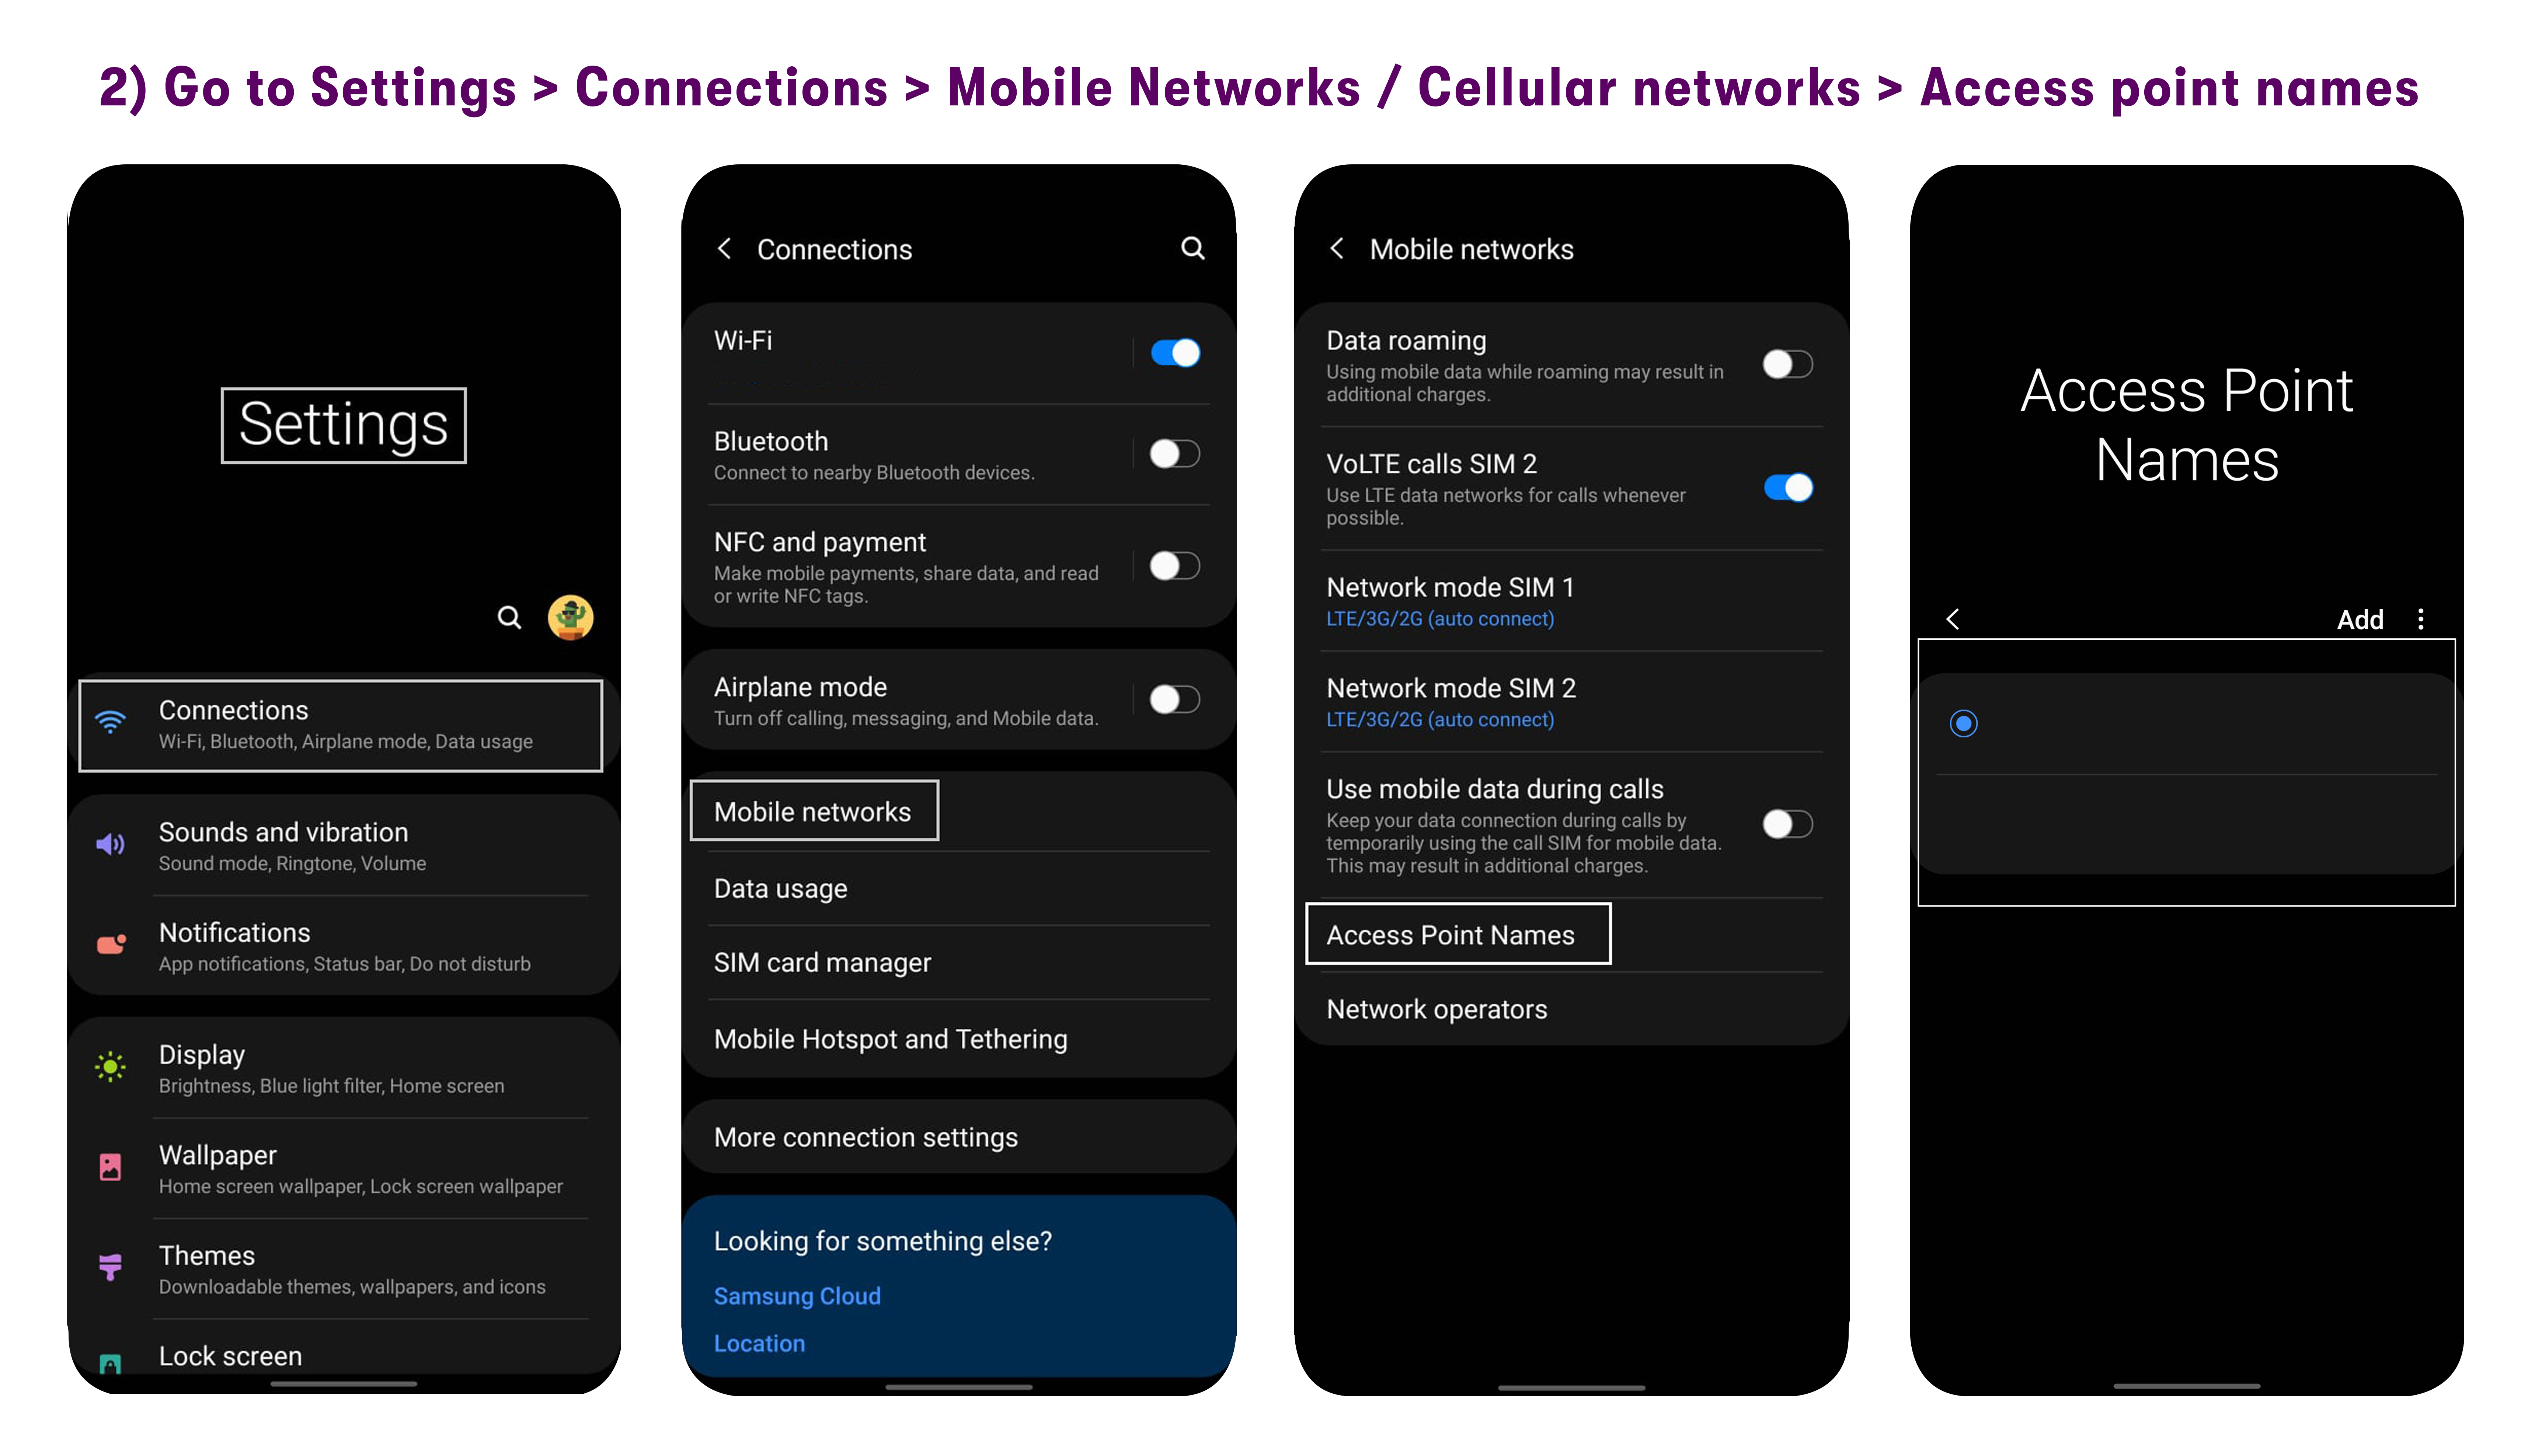
Step 4. Update the APN
Swipe up on the home screen to see all your apps.
Go to Settings > Connections / Network & Internet > Mobile Networks / Cellular networks > Access point names.
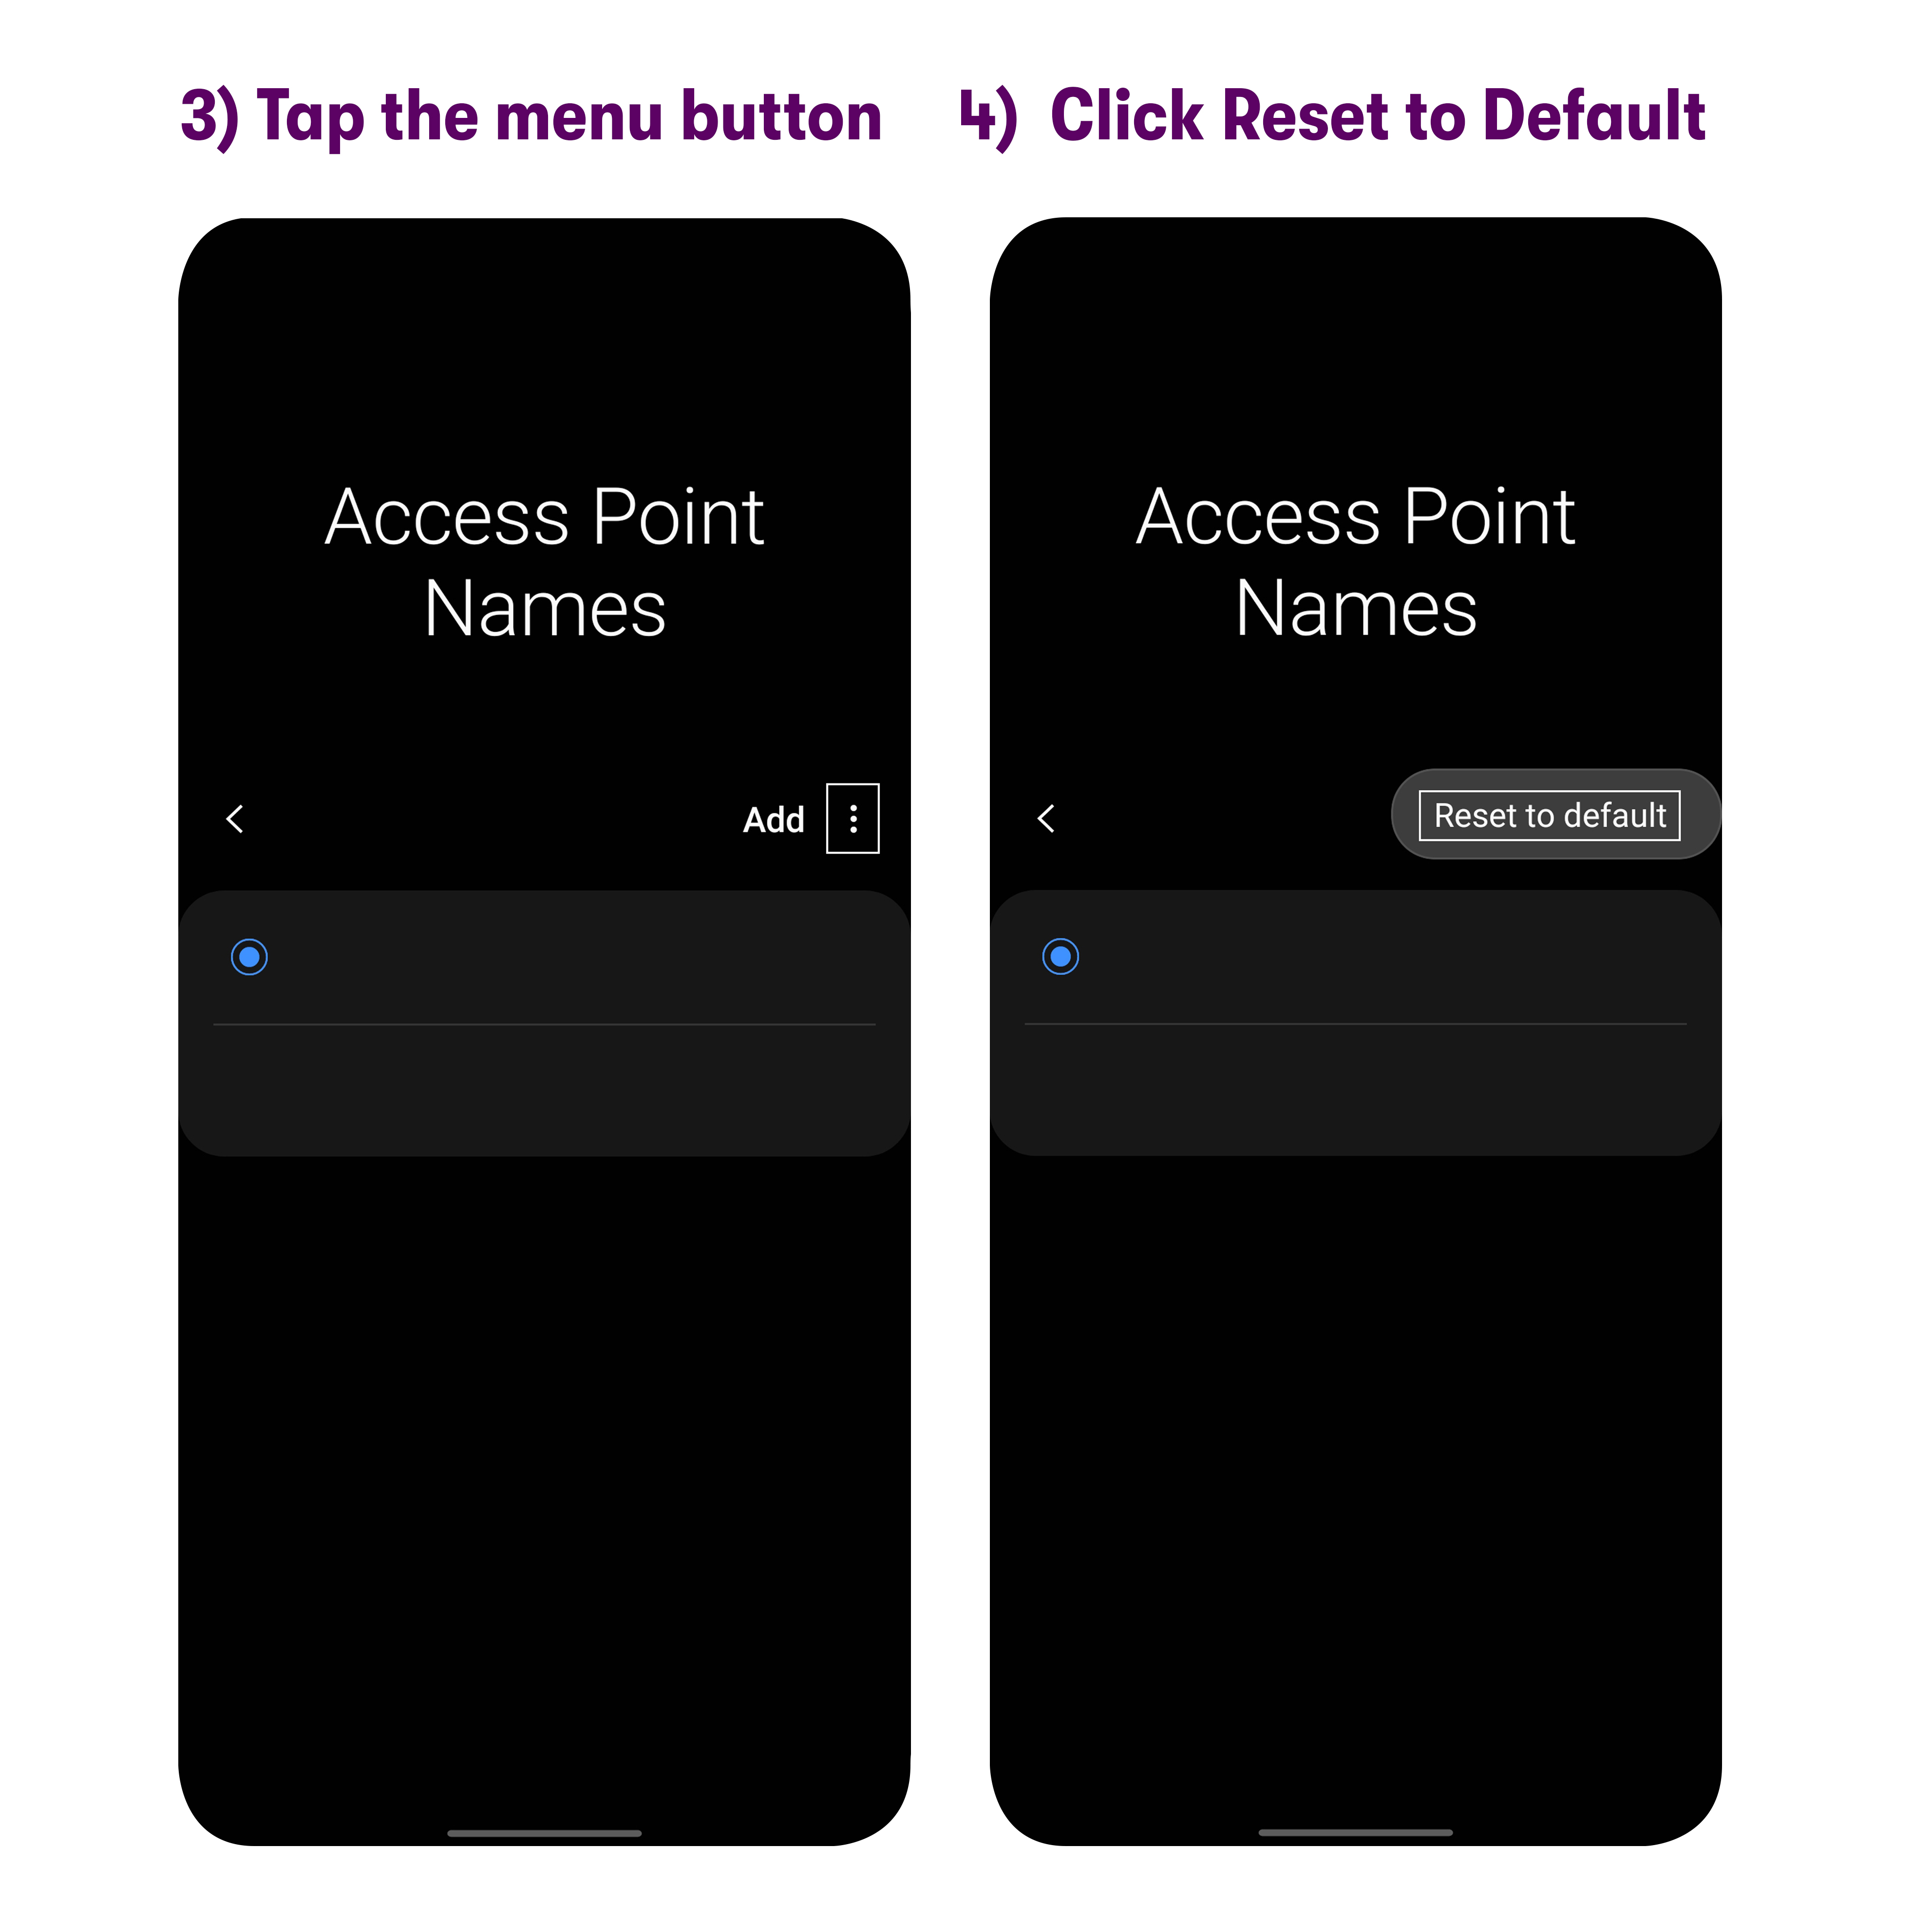
Tap the menu button (usually 3 stacked dots).
Click Reset to Default to reset the APN if pre-existing APN profiles from the previous carrier are there (skip this step if there are none).
APN settings are case-sensitive and do not have any spaces or special characters. The settings have to be entered exactly the way it appears below for the phone to work properly.
Tap ADD and create a 1st APN with the following information:
Leave all other fields blank, and save this configuration.
APN name: Verizon 2
APN: vzwinternet
MMS port: 80
MMSC: http://mms.vtext.com/servlets/mms
MCC: 311
MNC: 480
Apn protocol: iPv4/iPv6
Apn roaming protocol: iPv4/iPv6
APN type: default,suplPlease tap on the three dots and select 'Save'.
Note: Please make sure to tap on the circle next to the “Verizon 2” APN to select this APN to be used as default.
Tap ADD and create a 2nd APN with the following information:
Leave all other fields blank, and save this configuration.
APN name: Verizon FOTA
APN: VZWADMIN
MCC: 311
MNC: 480
APN type: fota
APN Protocol: iPv4/iPv6
APN Roaming Protocol: iPv4/iPv6Please tap on the three dots and select 'Save'.
Tap ADD and create a 3rd APN with the following information:
Leave all other fields blank, and save this configuration.
APN name: Verizon IMS
APN: VZWIMS
MCC: 311
MNC: 480
APN type: ims,ia
APN Protocol: iPv4/iPv6
APN Roaming Protocol: iPv4/iPv6Please tap on the three dots and select 'Save'.
Turn off Wi-Fi and Turn on Mobile Data
If you have followed the above steps correctly, you should be able to see signal bars by now.
Tap ADD and create a 4th APN with the following information:
Leave all other fields blank, and save this configuration.
APN name: Verizon CBS
APN: VZWAPP
MMSC: http://mms.vtext.com/servlets/mms
MCC: 311
MNC: 480
APN type: cbs,mms
APN Protocol: iPv4/iPv6
APN Roaming Protocol: iPv4/iPv6Please tap on the three dots and select 'Save'.
Please ensure “Verizon 2” is the APN that is selected and restart the device.
“Verizon 2” APN should have a blue/green circle next to it.
Kindly restart your phone now. Once restarted, please ensure Wi-Fi is OFF, and Mobile data is turned ON. Your service should be up and running by now!
Step 5. Reset Network Settings
If the phone does not start to work after following all the steps mentioned above, then you can try resetting your network settings:
Please go to Settings > Connections > General Management > Reset > Reset network settings.
Please restart your device.
Please note this will remove any saved Wi-Fi passwords too.
After the reset, please follow all the steps mentioned in this guide (part 1 to part 5) to ensure the settings are configured properly.
Step 6. Customer Service
If you are still having trouble accessing services after following these steps, then please reach out to our customer support via email, chat, or over the phone at any time of the day.

